Using the Dashboard
Summary
Stores
Stores Tab Overview
Stores > Status
Stores > Technical
Stores > General
Web Based Store Inventory / Online Menu
Download a Pick List for easy restocking
Stores > Restock
How To Set Pars
Sales Tax
What is a KID?
Scheduled Kiosk Lockdowns
Stores > Discounts
Stores > Financial
Products
Export Lots as CSV
Products > Transactions
Delete/Undelete (or Archiving) a Product
How to repurpose tags
How to Bulk Import Products
Products Overview
Products > Tag Orders
Export EPC Inventory
Products > Inventory
Add a Product
Products > Details
Tags
Transactions
Scheduled Reports: How-To Automate Transactions and Restocks Exports
Understanding Transaction Preauthorization and Processing Times
Transaction status definitions
Transactions > Logs
Coupon Reporting
Transactions > Customer Emails
Edit the default preauthorization amount
How to adjust a transaction or process a refund
How to View Transactions & Transactions Overview
How to Export Transactions for Enhanced Sales Analysis
How to prevent mischarges
Feedback
Discounts
Discounts > Add a Happy Hour Discount
Discounts > Add a Standard Discount
Discounts Overview
Discounts > Creating Coupons
Discounts > Add a Shelf Life Discount
How to redeem a coupon
How to end a Discount
Financials
Financials > Remittance Overview
Transactions included in a remittance
Remittance Processing Schedule
Adding Your ACH
How do I add/change my banking information?
Settings
Getting Started
Ordering Tags
Restocking Product
Setting Up Your New Store
How to restock a Byte store
Setting up your store to be NAMA-certified
Custom graphics install instructions
Branding your store
Setting up your Byte Technology store
How soon will I receive my store?
Standard Byte Store Specs
Tagging Best Practices
Tagging Frozen Food
Tagging Drinks and Liquid Products
Tagging Non-Perishable Products
Tagging Sandwiches, Salads, Wraps & Standard Packaging
Tagging snacks or soft packaging
Tagging Soups, Yogurts, Parfaits & Pudding
Tagging salads & hard packaging
Merchandising best practices
Test and verify inventory
Tagging heatable entrees
Tagging aluminum cans and foil-lined products
Dashboard Onboarding | A self-guided training
1. Introduction to Byte Technology Dashboard
2. Overview of Summary Page + Navigation Bar
3. Stores Section Overview
4. Products Section Overview
5. Transactions Section Overview
6. Feedback
7. Discounts Section Overview
8. Financials Section
9. Settings
10. Congratulations
Campus Card and Payroll Deduct Stores
Campus Cards & Employee Badge Payments FAQs
What Happens When a Customer Has Insufficient Card Funds?
Understanding Campus Cards
Byte Store Dimensions/Store Types
Troubleshooting & FAQs
Connectivity
How to Install an OptConnect Cellular Device on a Byte Store
Ethernet setup and networking requirements
Transactions made while store is offline
How do I get a store back online?
Code 400C
Code 600
Code C
Code E
No IP / Red or Yellow Border
Code 200
Sending Remote Commands
Screen Issues
Store Temperature
🧊 Why Your Dashboard May Show a Higher Temperature or “Too Warm” Status
Adjusting the store temperature
Inventory
Antennas in the Byte Store - Where to Place Your Products
Customer Inquiry: Need Help With Your Transaction?
Code 400
Door Lock Issues
Open a CSV file in Excel or Google Sheets
How to Reach Support
Combatting Theft With Your Byte Store
Error Codes: Out of Service Troubleshooting Guide
- All Categories
- Using the Dashboard
- Stores
- How To Set Pars
How To Set Pars

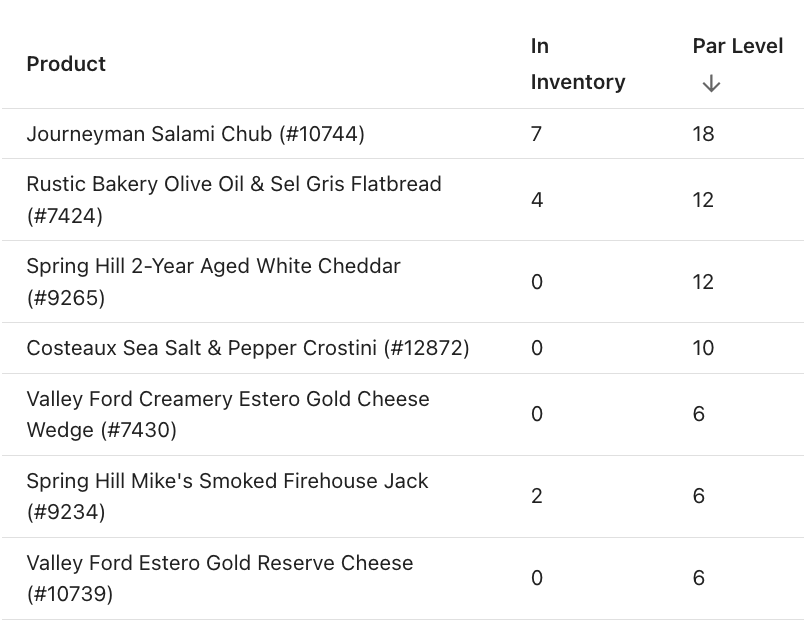
Setting pars at a Store allows you to define the quantity of each product you wish to be stocked in a store with each delivery. In the example below, from the Stores > Restock tab, you can see the quantity of a given product in inventory versus the par that is set - this determines the quantity of each product to include in a delivery. By setting pars you can be more efficient and save time servicing your stores on an ongoing basis.
How to Set Pars
- Navigate to Stores > Restock page.
- Click pencil icon on far right of the page.

- This will highlight the pars column and make it editable. Enter the par you wish to set for each product.
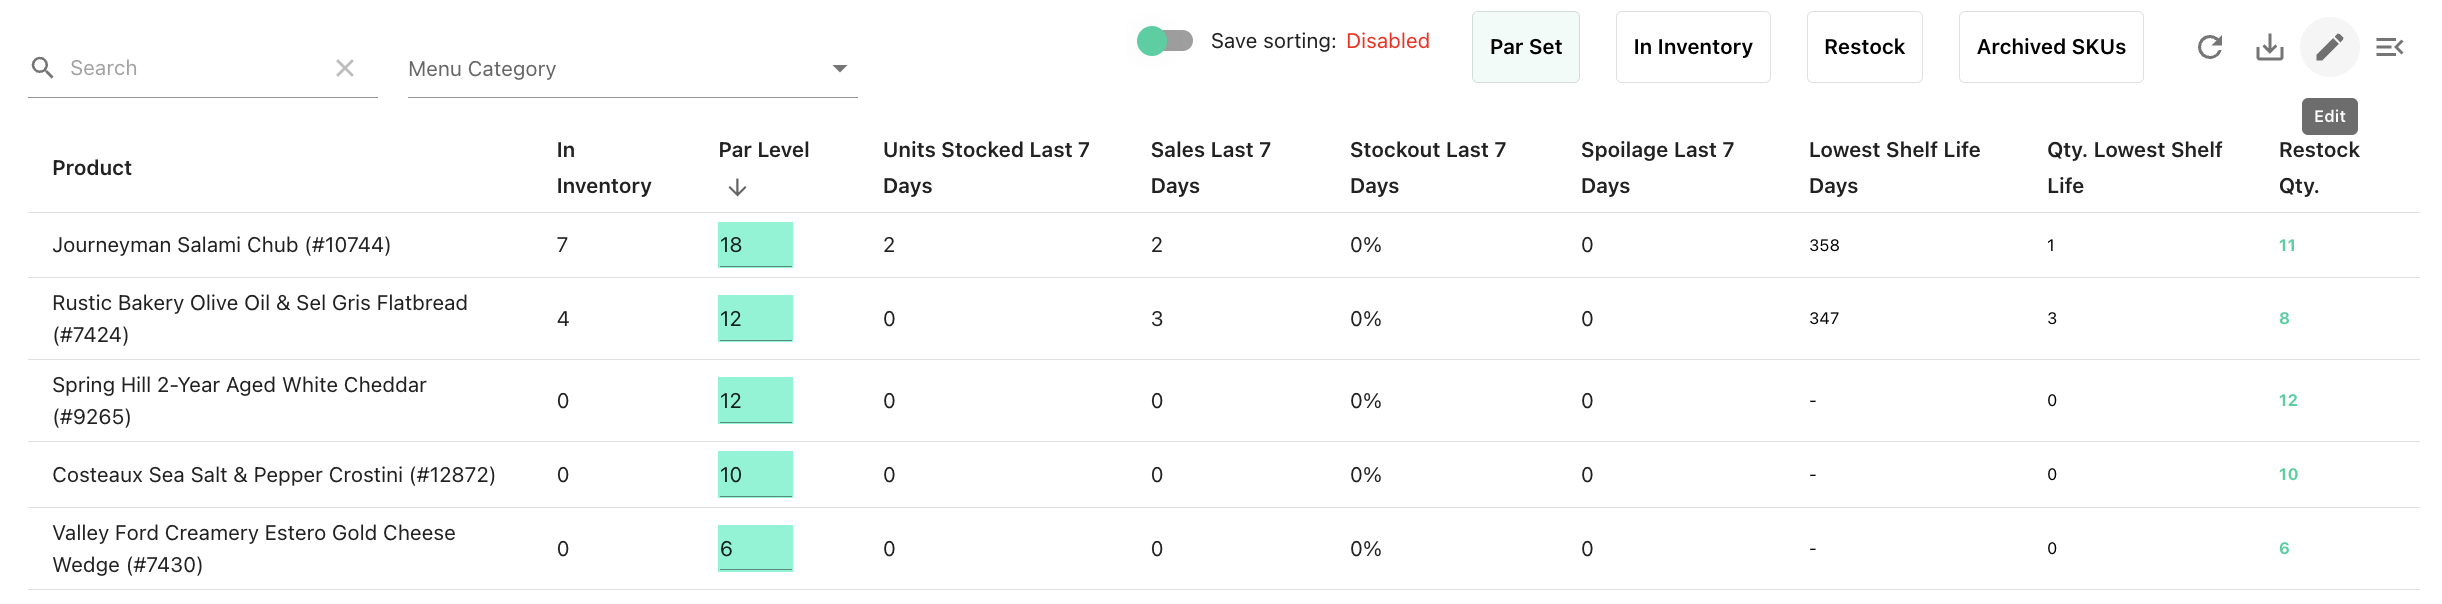
- When you've finished entering all pars, scroll to the bottom of the page and click Save Pars.

Now that you've set a par for each product, you'll be able to pull a Restock Report or pick list.