Using the Dashboard
Summary
Stores
Stores Tab Overview
Stores > Status
Stores > Technical
Stores > General
Web Based Store Inventory / Online Menu
Download a Pick List for easy restocking
Stores > Restock
How To Set Pars
Sales Tax
What is a KID?
Scheduled Kiosk Lockdowns
Stores > Discounts
Stores > Financial
Products
Export Lots as CSV
Products > Transactions
Delete/Undelete (or Archiving) a Product
How to repurpose tags
How to Bulk Import Products
Products Overview
Products > Tag Orders
Export EPC Inventory
Products > Inventory
Add a Product
Products > Details
Tags
Transactions
Scheduled Reports: How-To Automate Transactions and Restocks Exports
Understanding Transaction Preauthorization and Processing Times
Transaction status definitions
Transactions > Logs
Coupon Reporting
Transactions > Customer Emails
Edit the default preauthorization amount
How to adjust a transaction or process a refund
How to View Transactions & Transactions Overview
How to Export Transactions for Enhanced Sales Analysis
How to prevent mischarges
Feedback
Discounts
Discounts > Add a Happy Hour Discount
Discounts > Add a Standard Discount
Discounts Overview
Discounts > Creating Coupons
Discounts > Add a Shelf Life Discount
How to redeem a coupon
How to end a Discount
Financials
Financials > Remittance Overview
Bank Connections
Transactions included in a remittance
Remittance Processing Schedule
Adding Your ACH
How do I add/change my banking information?
Settings
Getting Started
Ordering Tags
Restocking Product
Setting Up Your New Store
How to restock a Byte store
Setting up your store to be NAMA-certified
Custom graphics install instructions
Branding your store
Setting up your Byte Technology store
How soon will I receive my store?
Standard Byte Store Specs
Tagging Best Practices
Tagging Frozen Food
Tagging Drinks and Liquid Products
Tagging Non-Perishable Products
Tagging Sandwiches, Salads, Wraps & Standard Packaging
Tagging snacks or soft packaging
Tagging Soups, Yogurts, Parfaits & Pudding
Tagging salads & hard packaging
Merchandising best practices
Test and verify inventory
Tagging heatable entrees
Tagging aluminum cans and foil-lined products
Dashboard Onboarding | A self-guided training
1. Introduction to Byte Technology Dashboard
2. Overview of Summary Page + Navigation Bar
3. Stores Section Overview
4. Products Section Overview
5. Transactions Section Overview
6. Feedback
7. Discounts Section Overview
8. Financials Section
9. Settings
10. Congratulations
Campus Card and Payroll Deduct Stores
Campus Cards & Employee Badge Payments FAQs
What Happens When a Customer Has Insufficient Card Funds?
Understanding Campus Cards & Payroll Deduct Payments
Byte Store Dimensions/Store Types
Troubleshooting & FAQs
Connectivity
How to Install an OptConnect Cellular Device on a Byte Store
Ethernet setup and networking requirements
Transactions made while store is offline
How do I get a store back online?
Code 400C
Code 600
Code C
Code E
No IP / Red or Yellow Border
Code 200
Sending Remote Commands
Screen Issues
Store Temperature
🧊 Why Your Dashboard May Show a Higher Temperature or “Too Warm” Status
Adjusting the store temperature
Inventory
Antennas in the Byte Store - Where to Place Your Products
Customer Inquiry: Need Help With Your Transaction?
Code 400
Door Lock Issues
Open a CSV file in Excel or Google Sheets
How to Reach Support
Combatting Theft With Your Byte Store
Error Codes: Out of Service Troubleshooting Guide
- All Categories
- Using the Dashboard
- Discounts
- Discounts > Creating Coupons
Discounts > Creating Coupons
Coupons are great to use on individual transactions when you do not want a discount to appear on the menu screen. Coupons are entered on the menu screen after a transaction ends - you will see a coupon box to enter underneath the Email address box.
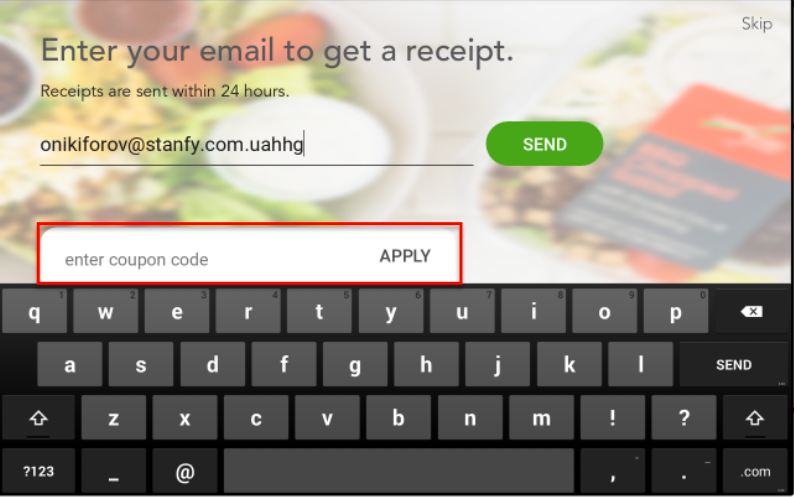
Creating Coupon Codes
- Navigate to the Discounts tab
- Select + Add in the top right-hand corner
- Select Coupon
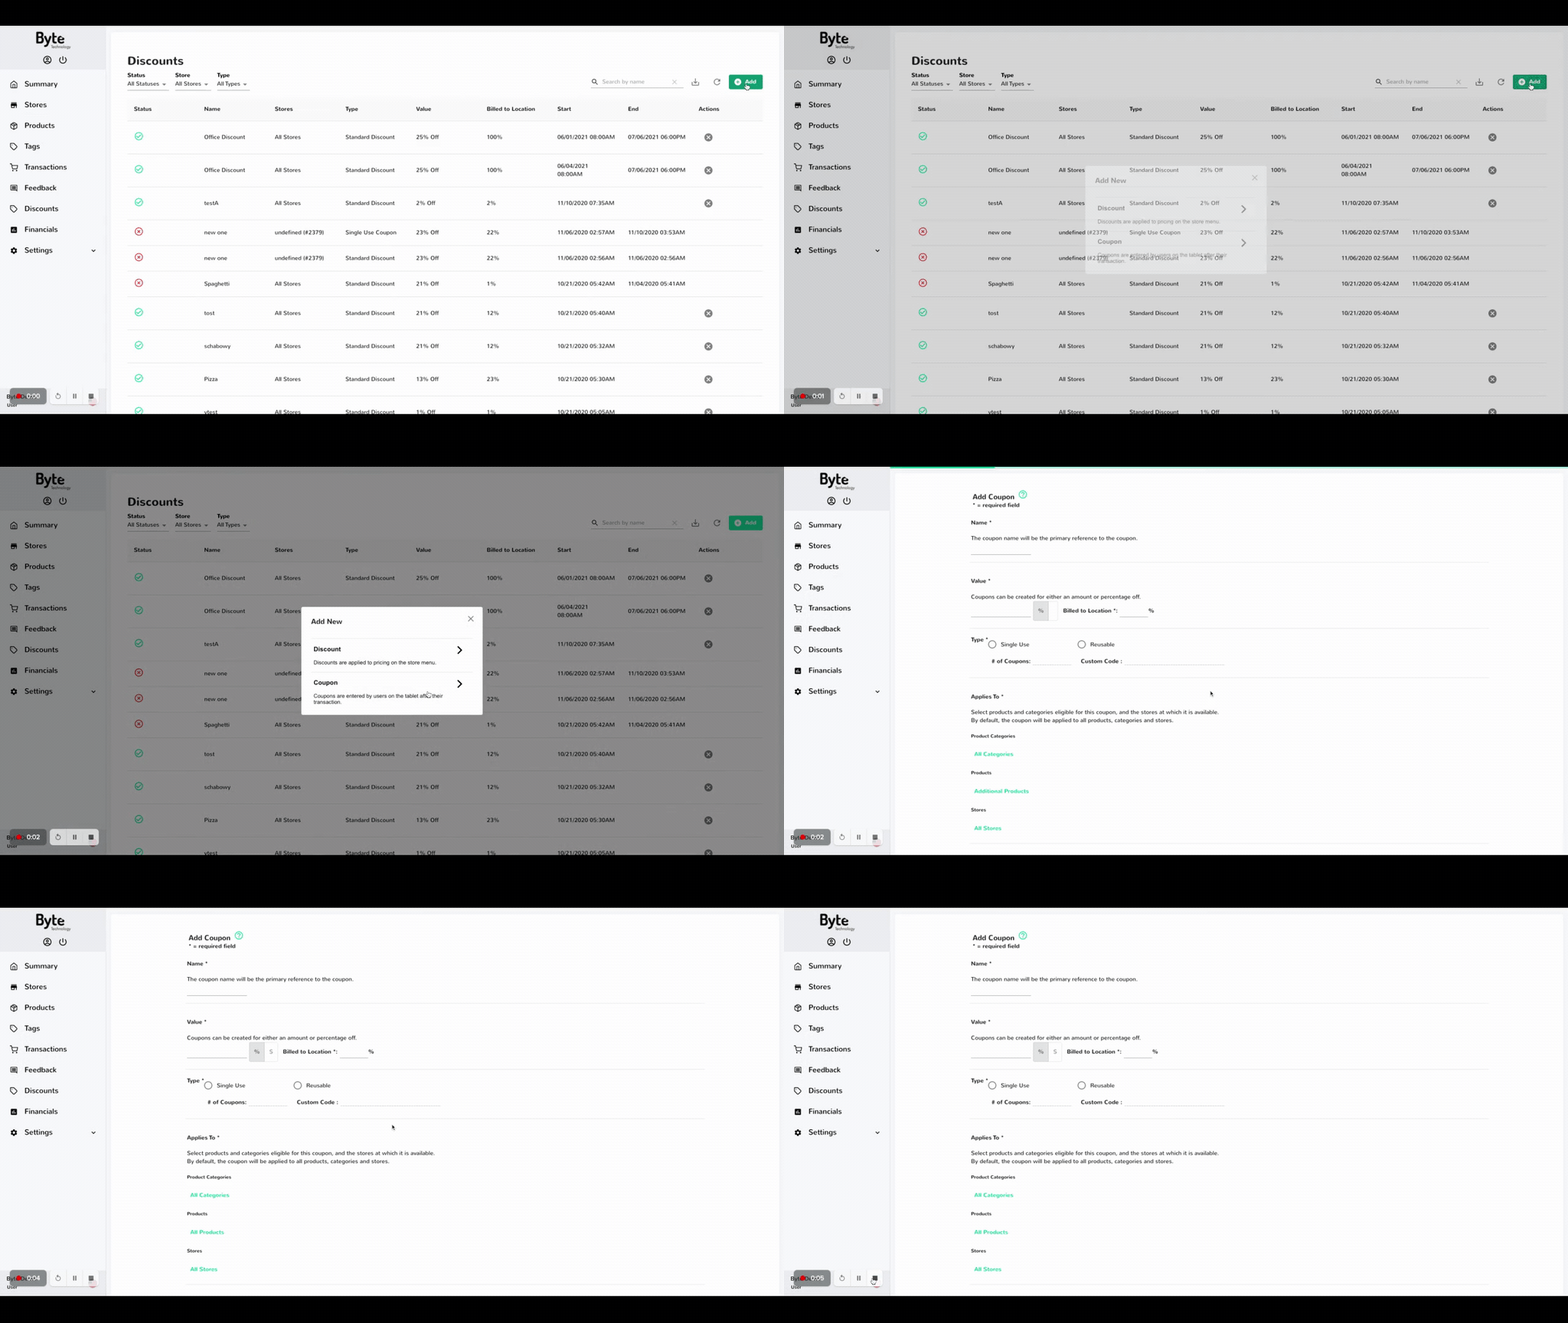
Complete each section accordingly:
Name - Used as the primary reference to the discount. This name will be visible in the discount CSV export and used to easily search in the table view showing all current and expired discounts.
Value - the amount or percentage you wish to be discounted to the transaction when the coupon is applied
Billed to Location - the amount that the location of the Byte store is to be charged for this discount, scale 0-100%
Type: select either Single Use, Reusable, or Decline Balance
Applies To - used to select products and/or categories eligible for this coupon, and which Byte stores it is valid. By default, the discount will be applied to all products, categories, and Byte stores.
Active Dates - used to know the date range of when the coupon is valid
Click Save once completed
Single-Use Coupons:
These coupon codes can only be used once. Once they've been used, they can never be used again. For single-use coupons, you will create a coupon name, but the name will not be the coupon code. You will input the number of coupons you desire, and Byte's system will generate that many unique coupon codes.
Finding your Single-Use Codes: You can pull the coupon code report at any time after creating the coupon.
- Navigate to the Discounts tab
- Select the coupon discount in the table view
- Select Export Coupon Info
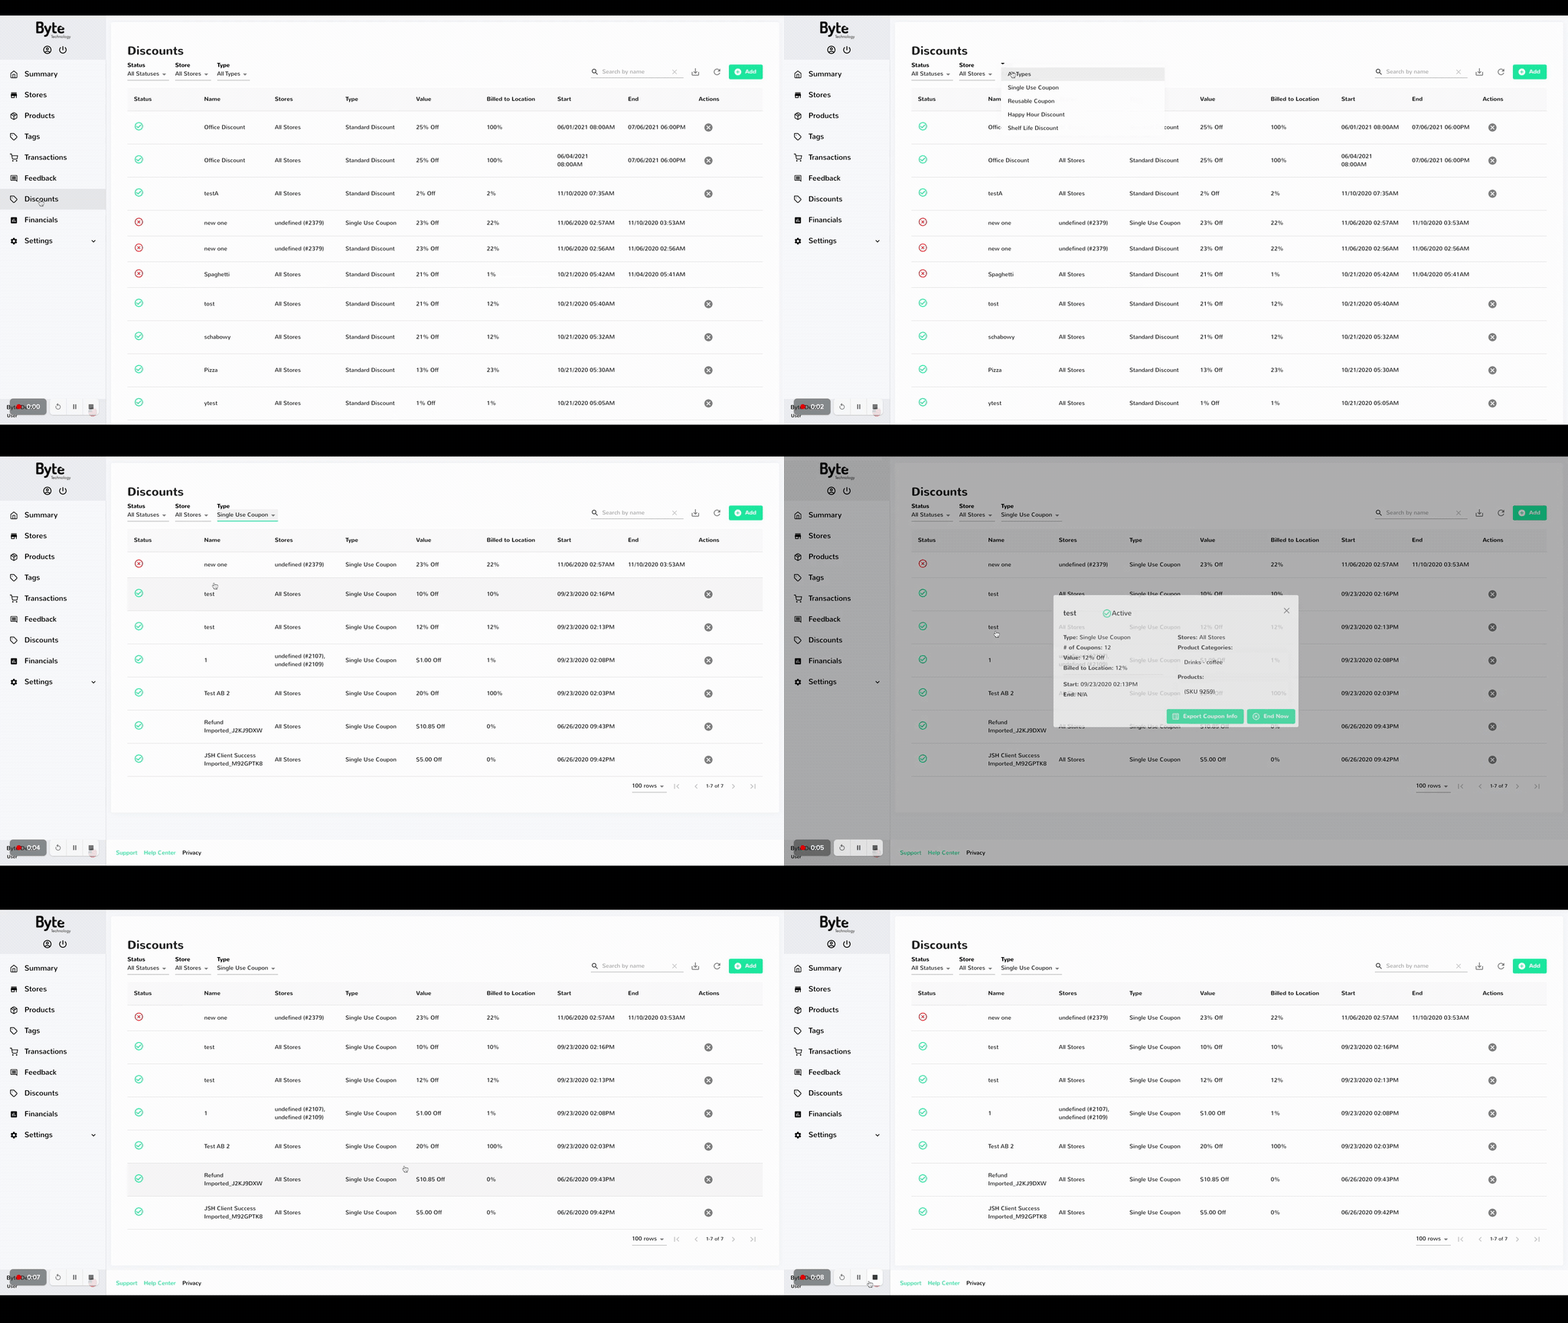
This export will not only show you each coupon code, but it will show you how many times it has been used.
Reusable Coupon:
These coupons allow the same code to be used however many times as long as the coupon is active and for the applicable products. You will customize the coupon code your customers will use. If they don't enter it in exactly, then their coupon won't apply to the order. Our system will let know if the coupon code worked after they input it and hit "apply."
Declining-Balance Coupon:
These coupons are designed to work like a gift card.
The declining balance requires you to create a custom code and a provide # of coupons. The best way to think about it is if you're providing this coupon for 1 person/entity or multiple.
1 person/entity:
Lets say you are providing the declining balance to an office. The boss wants you to provide $200 worth of food for their location per month. You created 1 coupon with custom code "STAFF" and a $200 balance. The coupon has no expiration date, since you plan on refilling the balance every month. The boss will share that single coupon code with his staff.
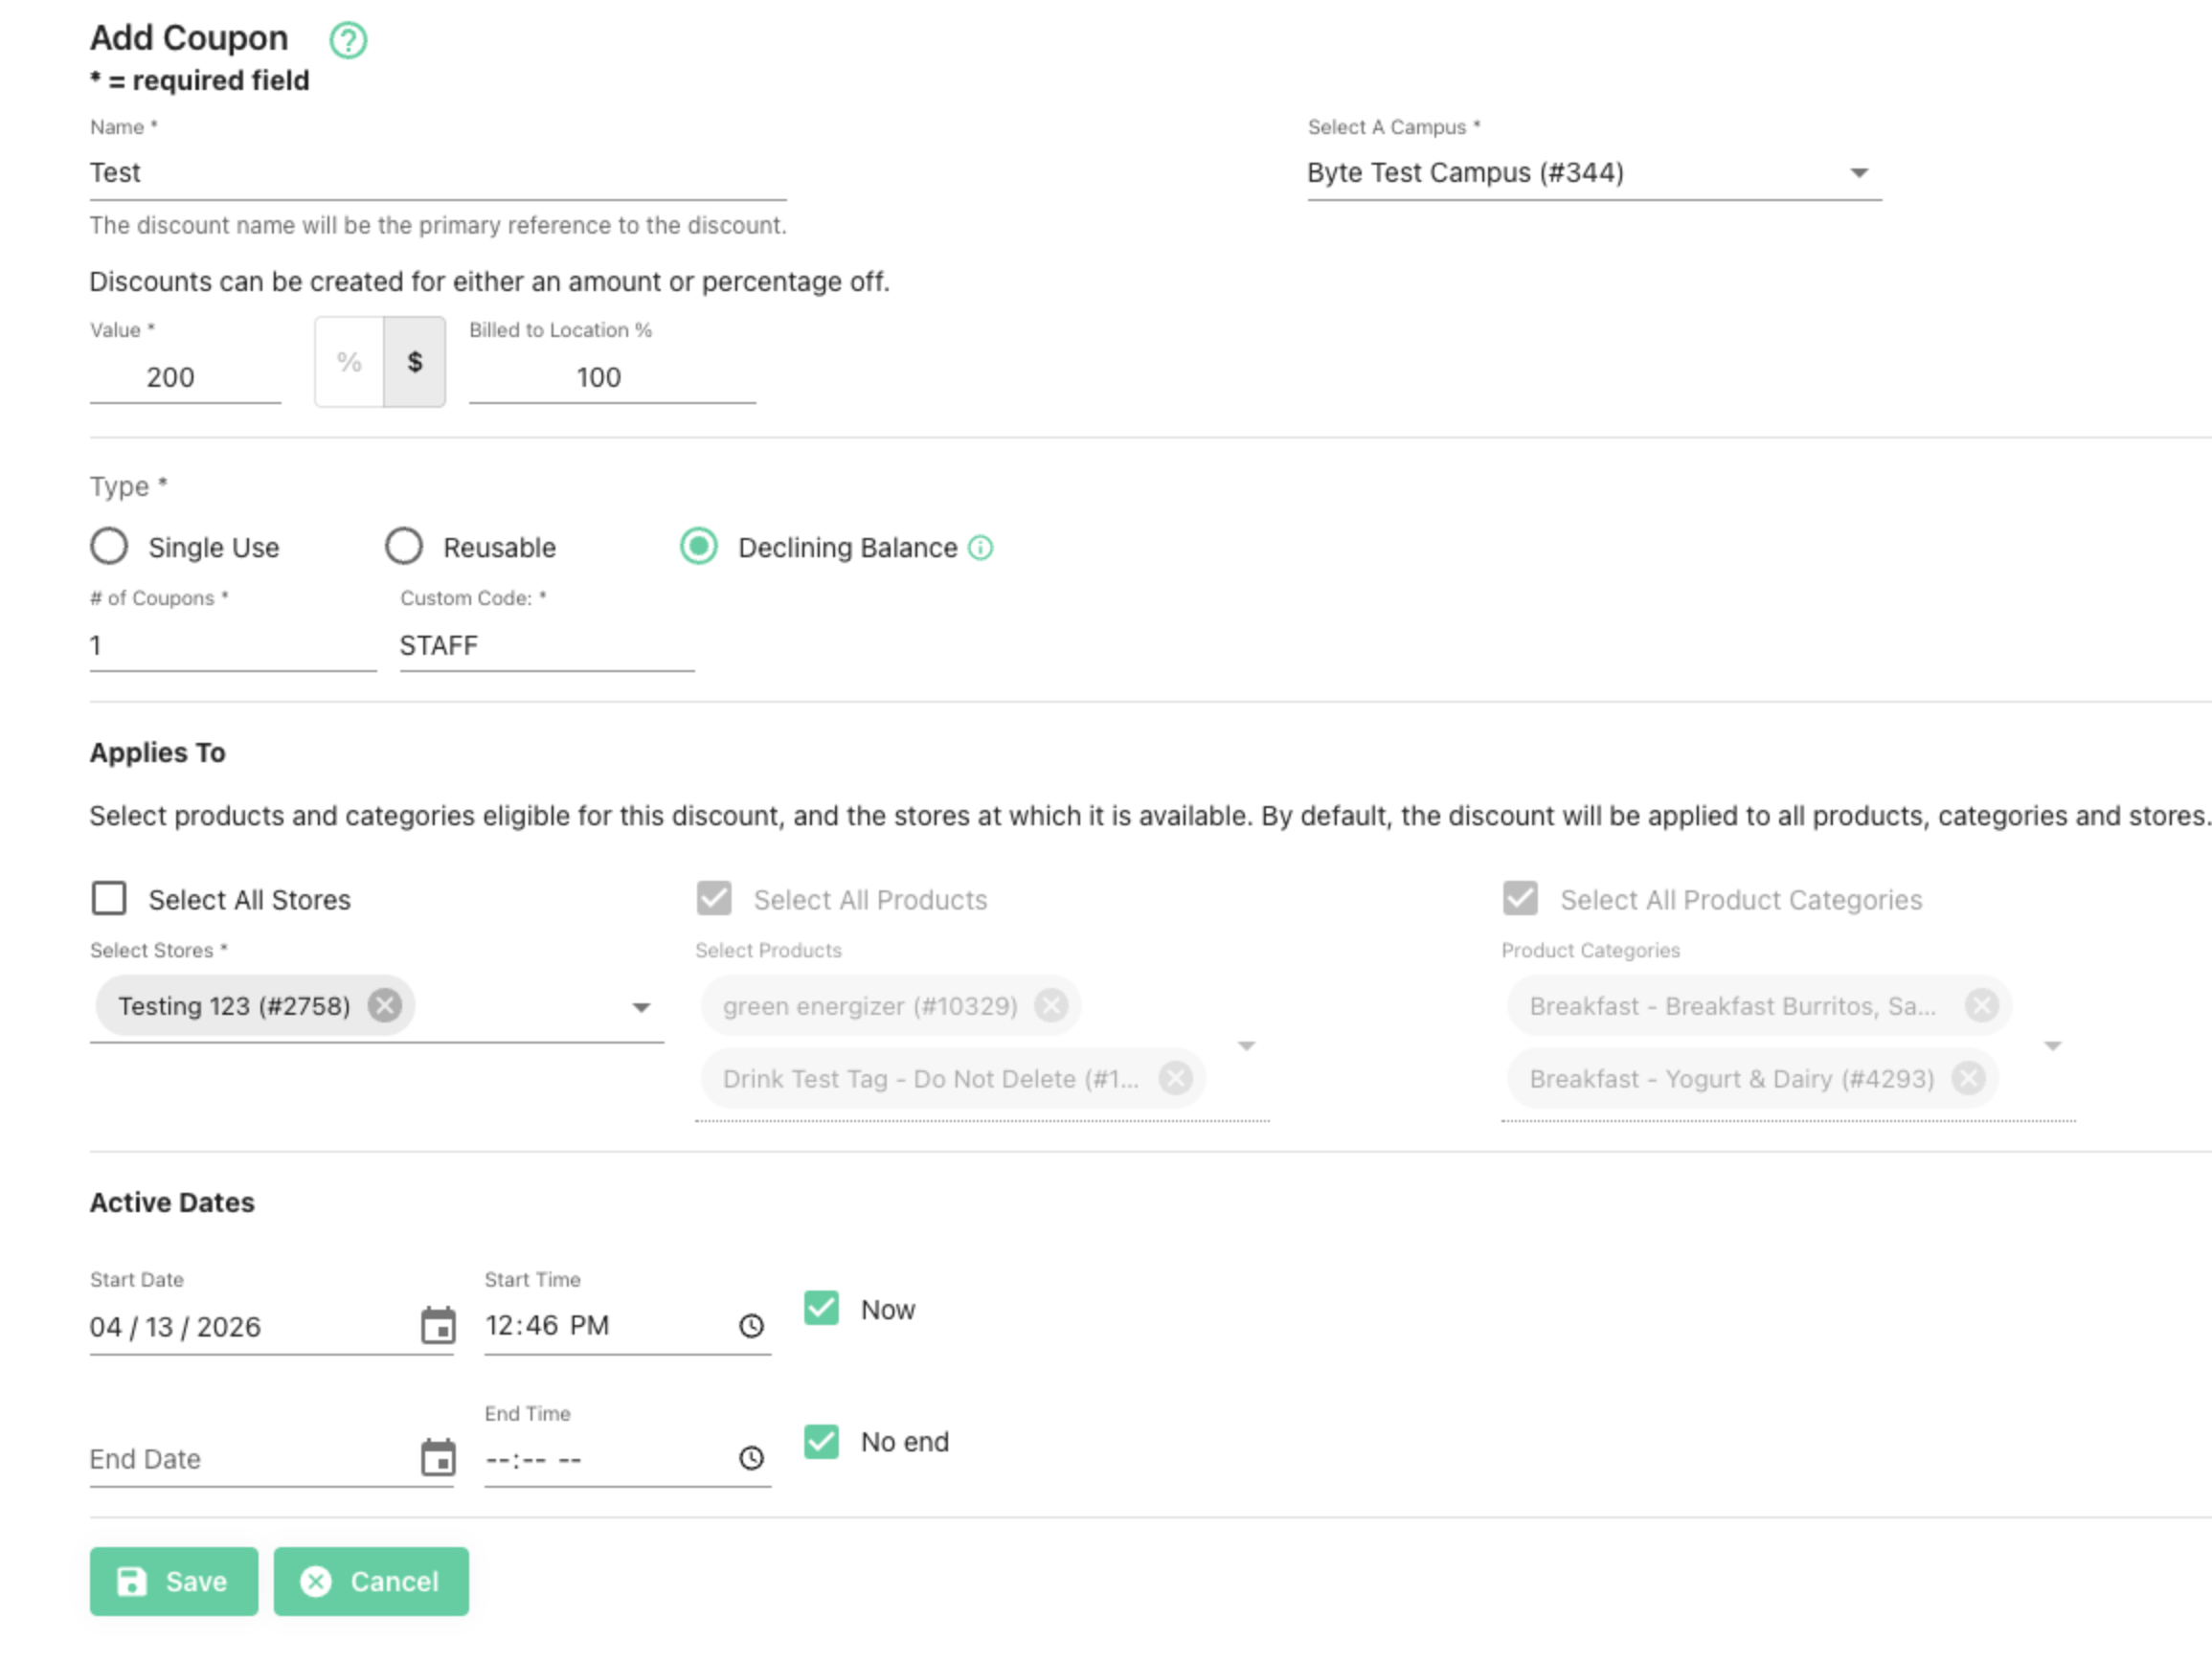
You can click on the coupon to export the coupon info, end it, and adjust the balance:
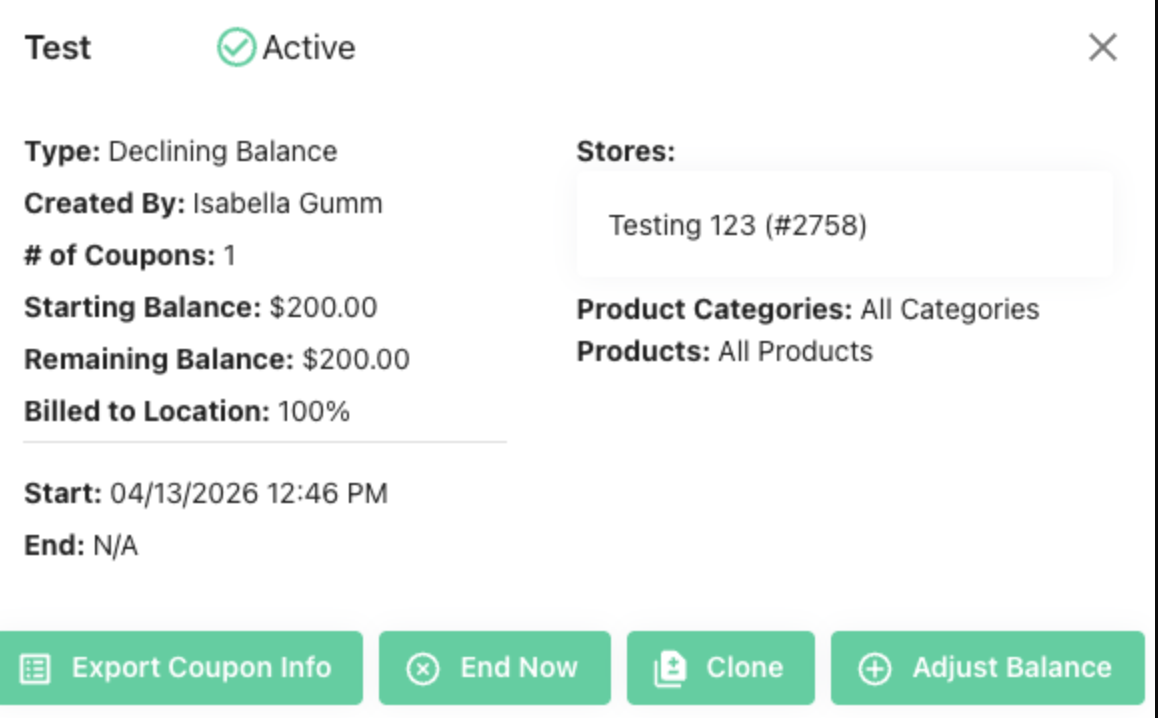
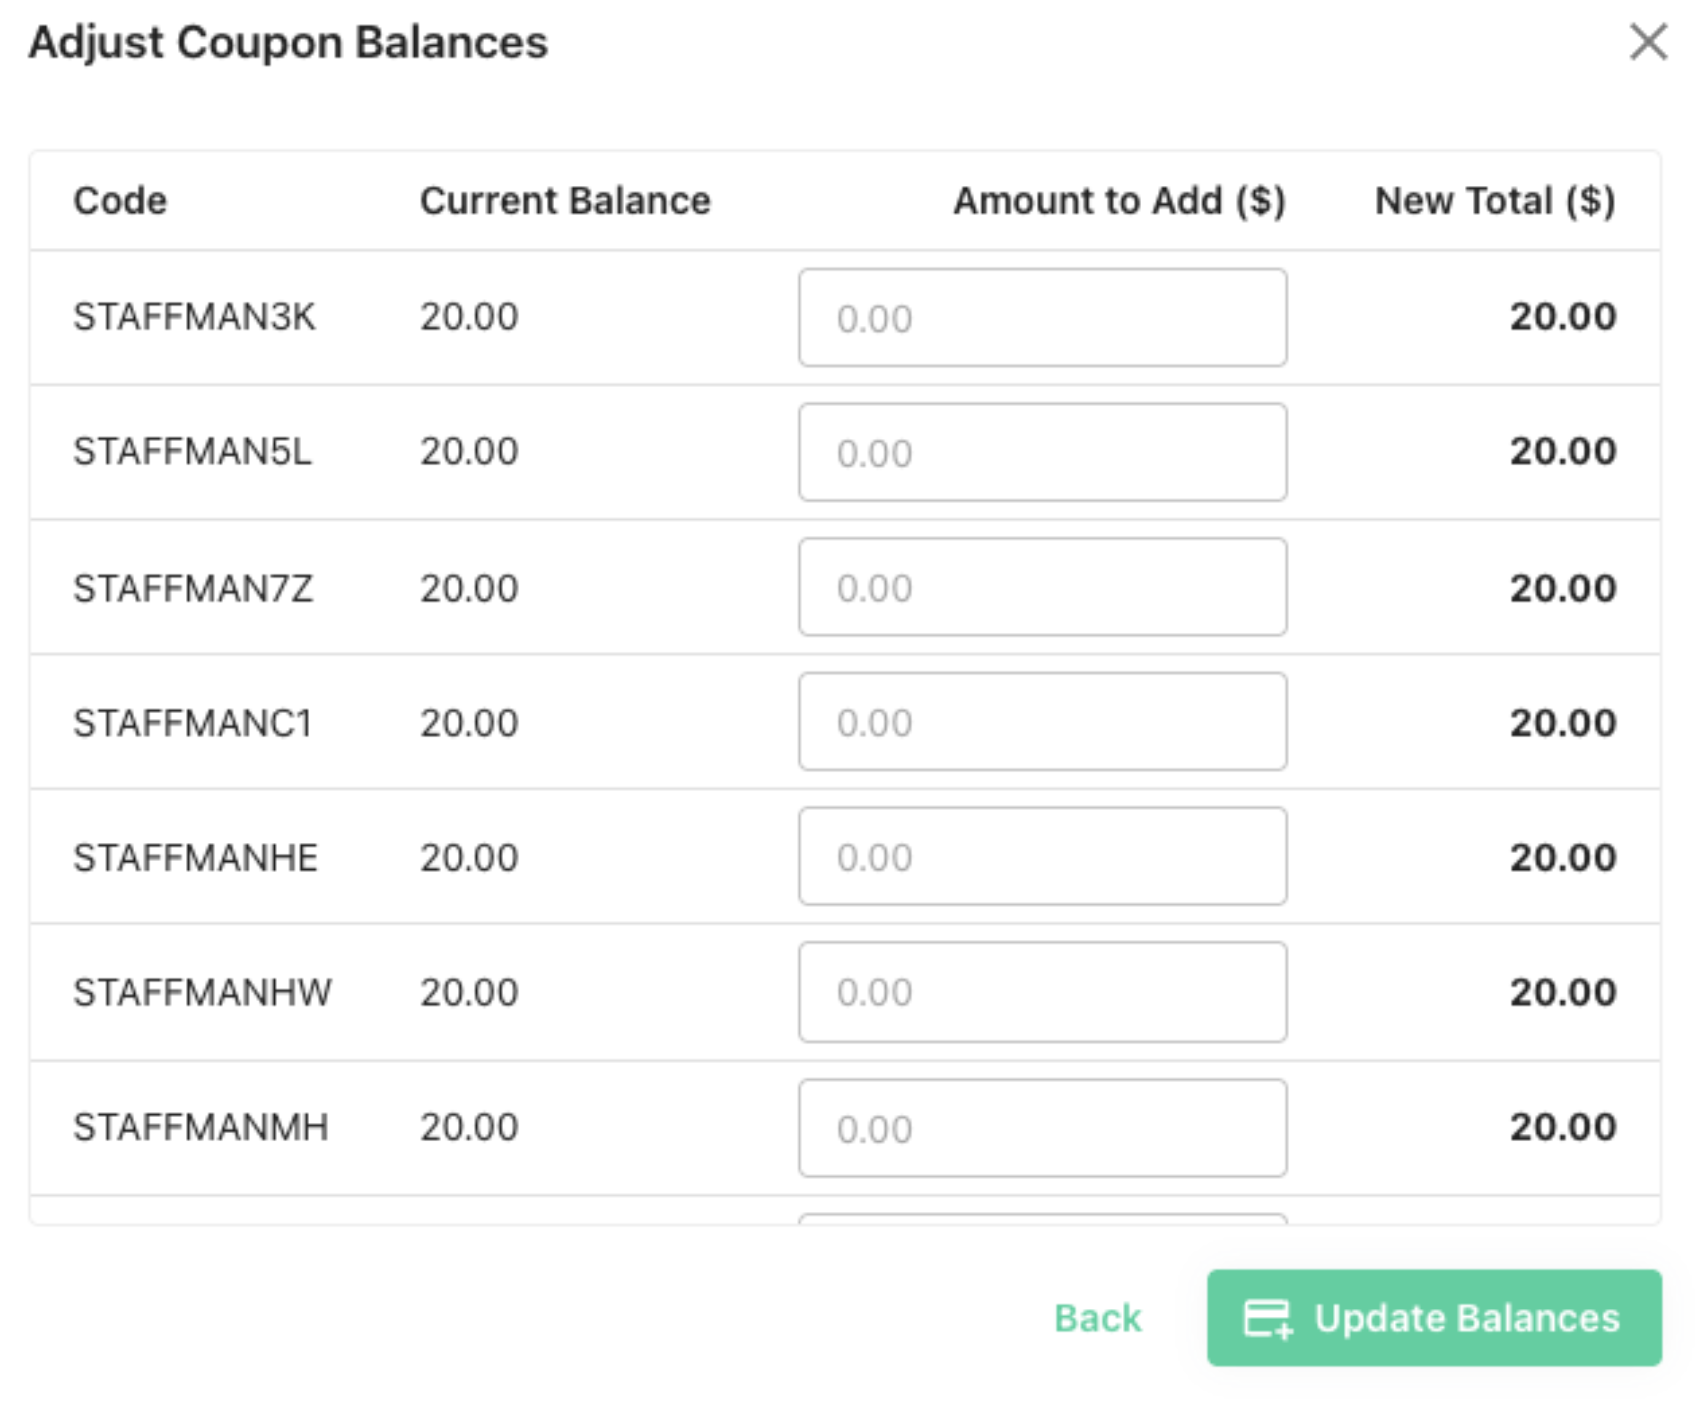
When I click on "adjust balance," I can see how much is available to use and can add more as I see fit:
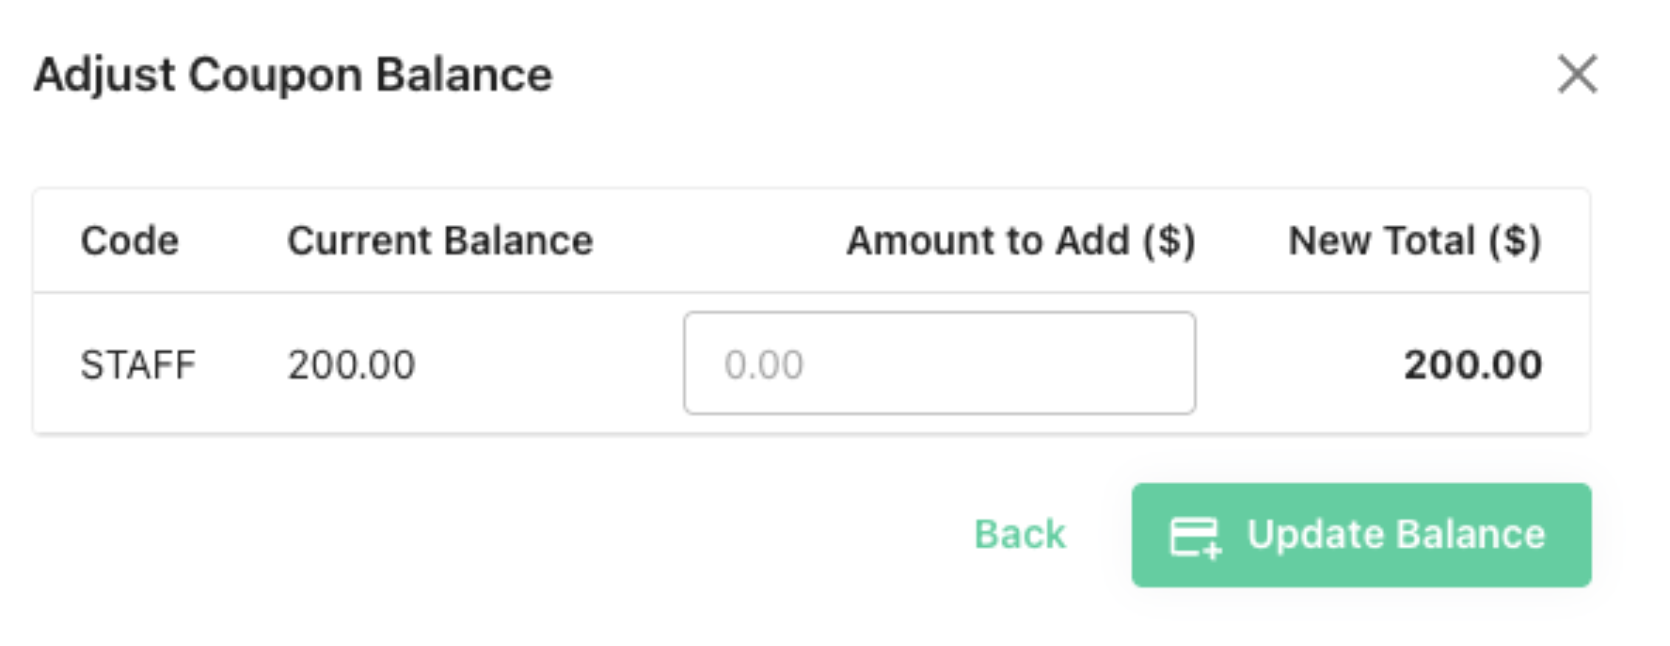
His team will use the same coupon code until the balance has been used.
Multiple people:
Now lets say a different office wants you to offer a declining balance but wants you to provide a coupon code per manager. They have 10 managers, and they want each manager to have a $20 balance per month. The coupon has no expiration date, since you plan on refilling the balance every month.
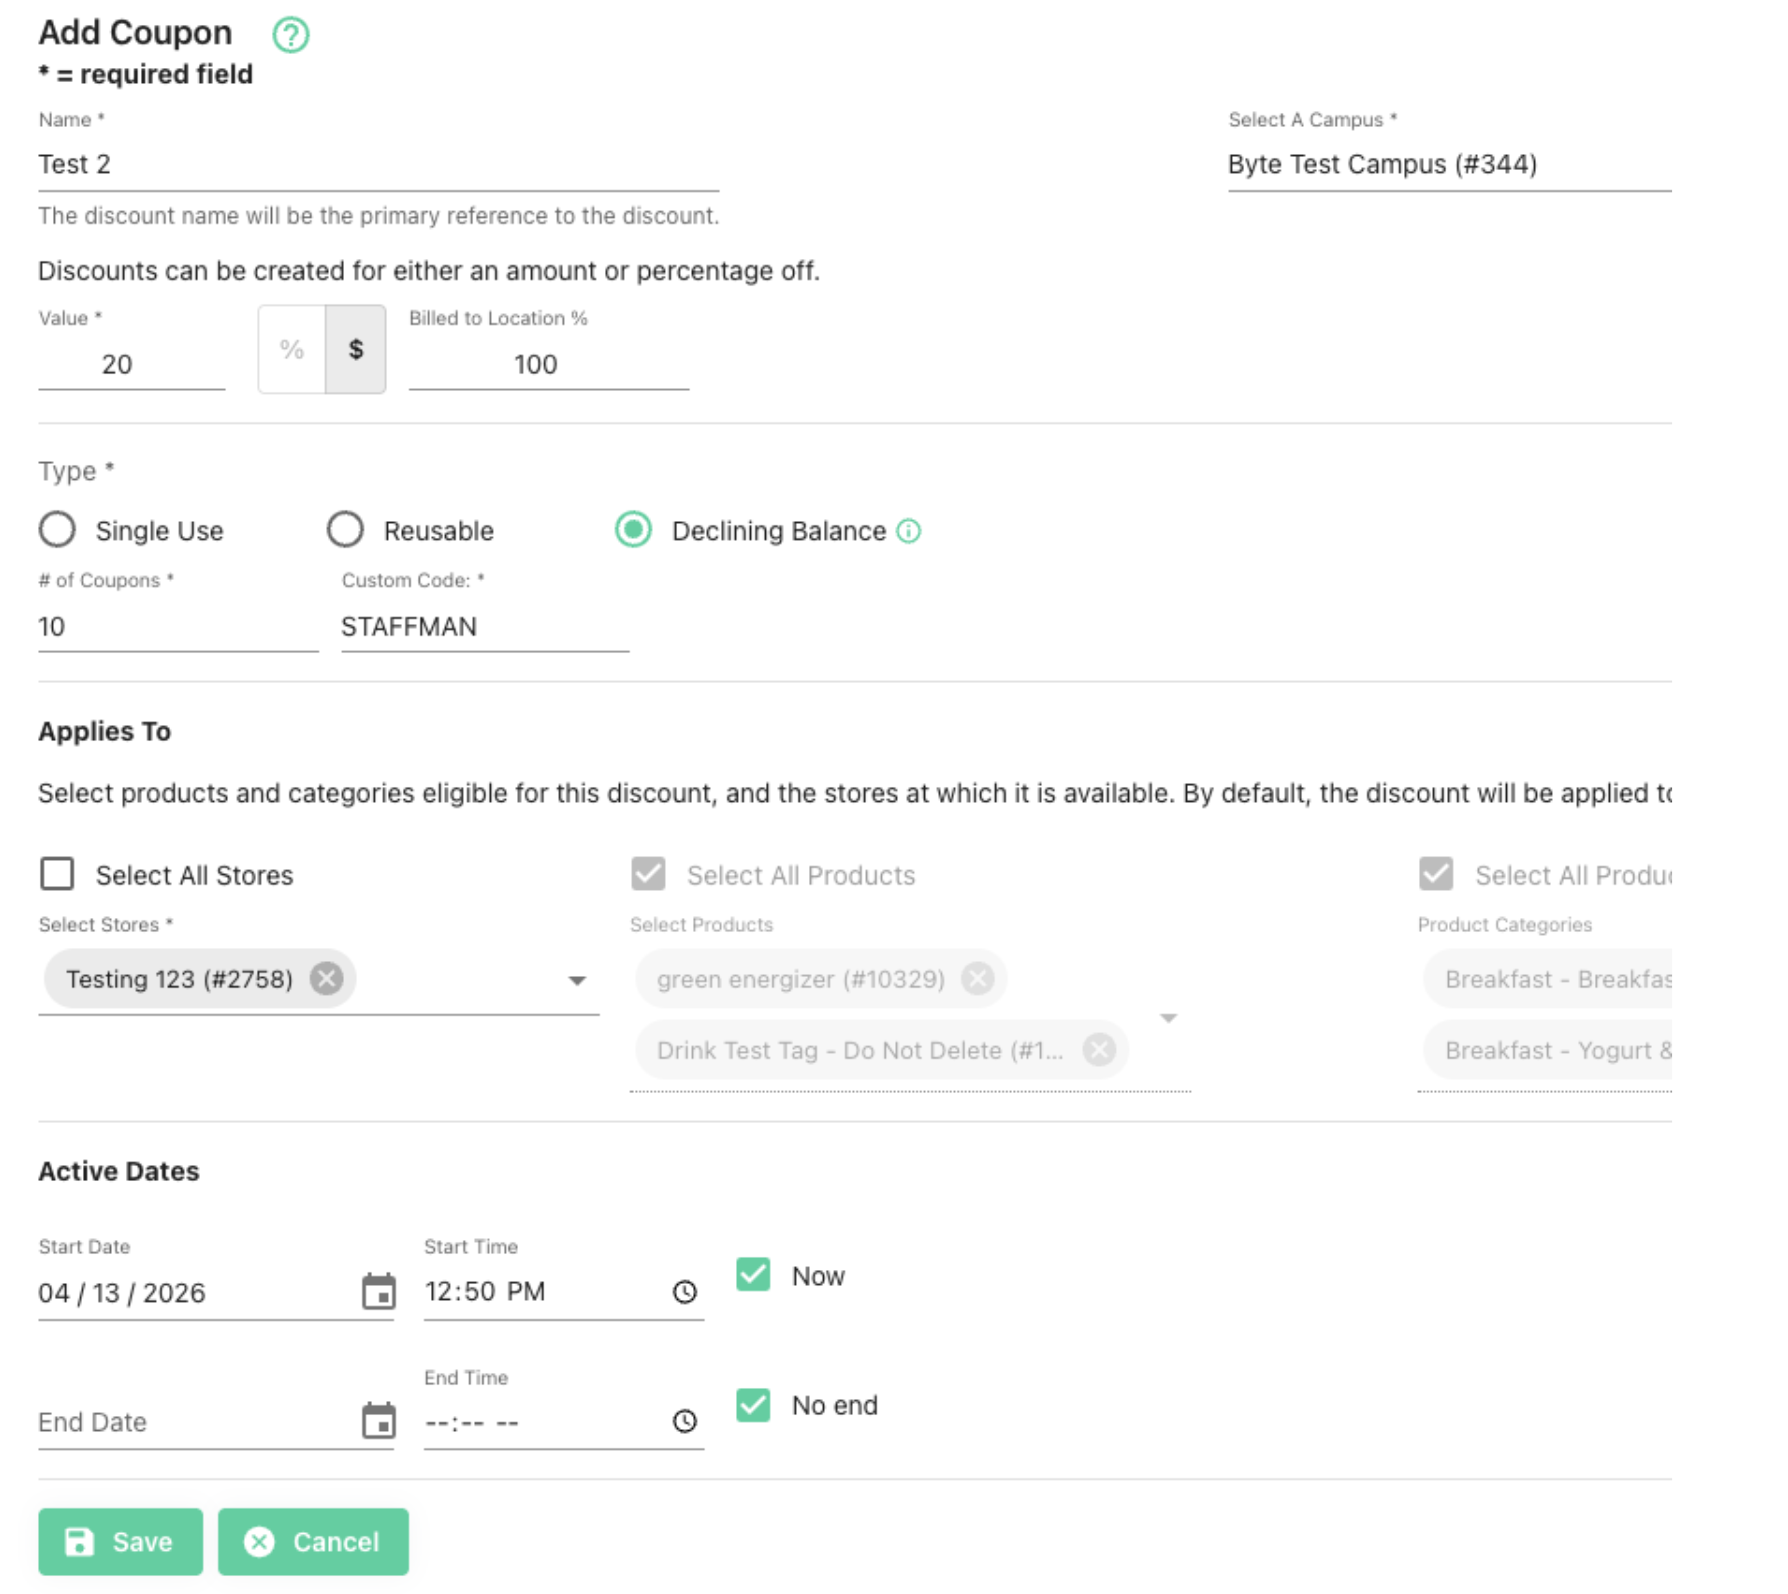
This will create 10 coupon codes. In this case, you will need to click on the coupon to "Export Coupon Info" to snag each unique code:
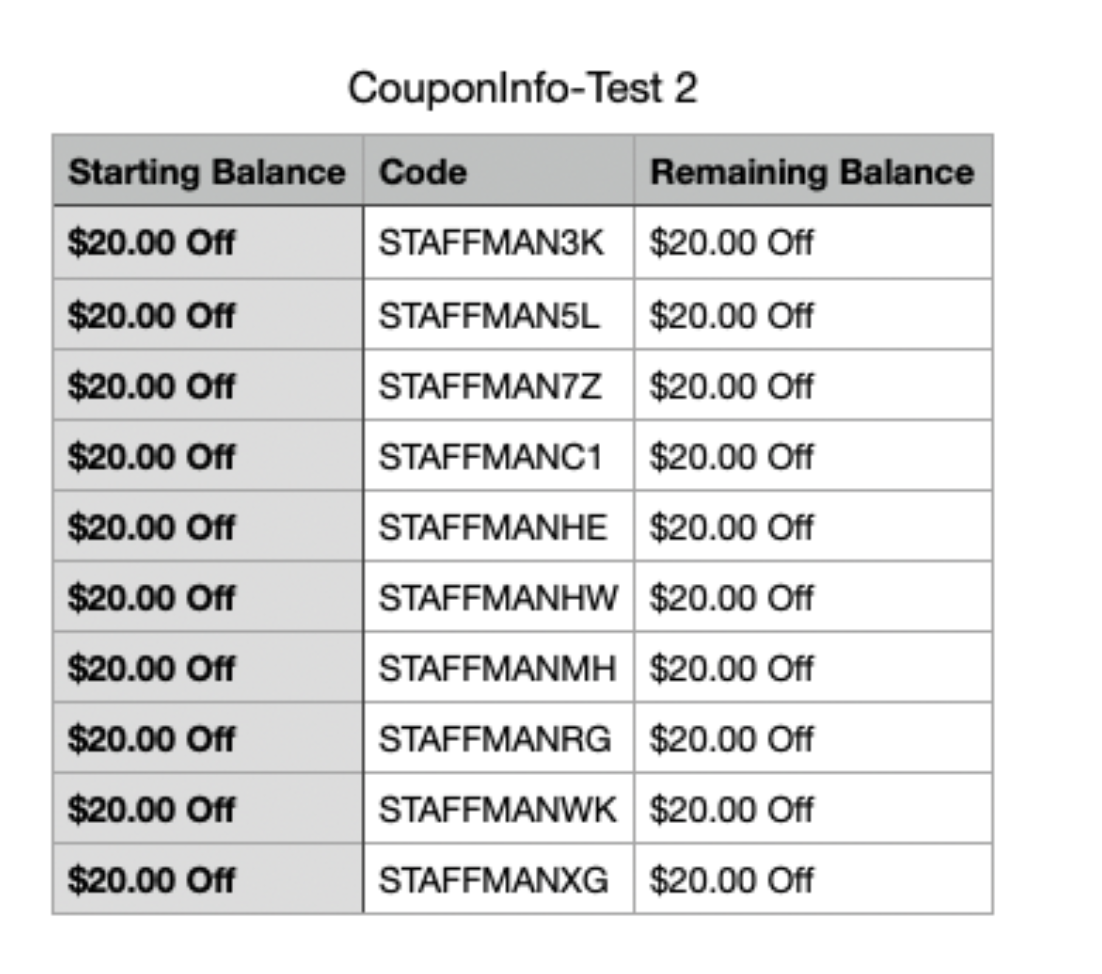
The boss (or you) will need to provide each manager with their coupon code. Each manager will use their unique coupon code with a $20 balance on each one. You can replenish each code as needed: