Using the Dashboard
Summary
Stores
Stores Tab Overview
Stores > Status
Stores > Technical
Stores > General
Web Based Store Inventory / Online Menu
Download a Pick List for easy restocking
Stores > Restock
How To Set Pars
Sales Tax
What is a KID?
Stores > Discounts
Stores > Financial
Products
Export Lots as CSV
Products > Transactions
Delete/Undelete (or Archiving) a Product
How to repurpose tags
How to Bulk Import Products
Products Overview
Products > Tag Orders
Export EPC Inventory
Products > Inventory
Add a Product
Products > Details
Tags
Transactions
Understanding Transaction Preauthorization and Processing Times
Transaction status definitions
Transactions > Logs
Coupon Reporting
Transactions > Customer Emails
Edit the default preauthorization amount
How to adjust a transaction or process a refund
How to View Transactions & Transactions Overview
How to Export Transactions for Enhanced Sales Analysis
How to prevent mischarges
Feedback
Discounts
Discounts > Add a Happy Hour Discount
Discounts > Add a Standard Discount
Discounts Overview
Discounts > Creating Coupons
Discounts > Add a Shelf Life Discount
How to redeem a coupon
How to end a Discount
Financials
Settings
Getting Started
Remittances
Transactions included in a remittance
Remittance Processing Schedule
How do I provide my banking information?
Ordering Tags
Restocking Product
Setting Up Your New Store
How to restock a Byte store
Setting up your store to be NAMA-certified
Custom graphics install instructions
Branding your store
Setting up your Byte Technology store
How soon will I receive my store?
Standard Byte Store Specs
Tagging Best Practices
Tagging Frozen Food
Tagging drinks
Tagging Non-Perishable Products
Product tagging best practices
Tagging sandwiches, wraps, and burritos
Tagging snacks or soft packaging
Tagging soups or yogurts
Tagging salads & hard packaging
Are RFID tags microwave safe?
Merchandising best practices
Test and verify inventory
Tagging heatable entrees
Tagging aluminum cans and foil-lined products
Dashboard Onboarding | A self-guided training
1. Introduction to Byte Technology Dashboard
2. Overview of Summary Page + Navigation Bar
3. Stores Section Overview
4. Products Section Overview
5. Transactions Section Overview
6. Feedback
7. Discounts Section Overview
8. Financials Section
9. Settings
10. Congratulations
Campus Card Stores
Campus Cards FAQs
What Happens When a Customer Has Insufficient Card Funds?
Understanding Campus Cards
Byte Store Dimensions/Store Types
Troubleshooting & FAQs
Connectivity
How to Install an OptConnect Cellular Device on a Byte Store
Ethernet setup and networking requirements
Transactions made while store is offline
How do I get a store back online?
Code 400C
Code 600
Code C
Code E
No IP / Red or Yellow Border
Code 200
Sending Remote Commands
Screen Issues
Store Temperature
🧊 Why Your Dashboard May Show a Higher Temperature or “Too Warm” Status
Adjusting the store temperature
Inventory
Antennas in the Byte Store - Where to Place Your Products
Customer Inquiry: Need Help With Your Transaction?
Code 400
Door Lock Issues
Open a CSV file in Excel or Google Sheets
How to Reach Support
Combatting Theft With Your Byte Store
Error Codes: Out of Service Troubleshooting Guide
Internal Troubleshooting
- All Categories
- Using the Dashboard
- Settings
- Users > How to create a User and archive a User
Users > How to create a User and archive a User
The Users section of the Dashboard is where you'll set up your team with access to the online dashboard and/or the physical Byte Technology stores.
Role Definitions
There are two different levels of users:
Dashboard User: Access to the entire online dashboard plus the premium tab that includes discounts and coupons
Restock: only has access to the physical store unit log-in for restocking or maintenance purposes
How to Create a New User
Users are quick and easy to create. Follow the steps below:
- To add or edit a user select the Settings tab from the left-hand panel
- Select Users
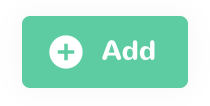
- Select + Add
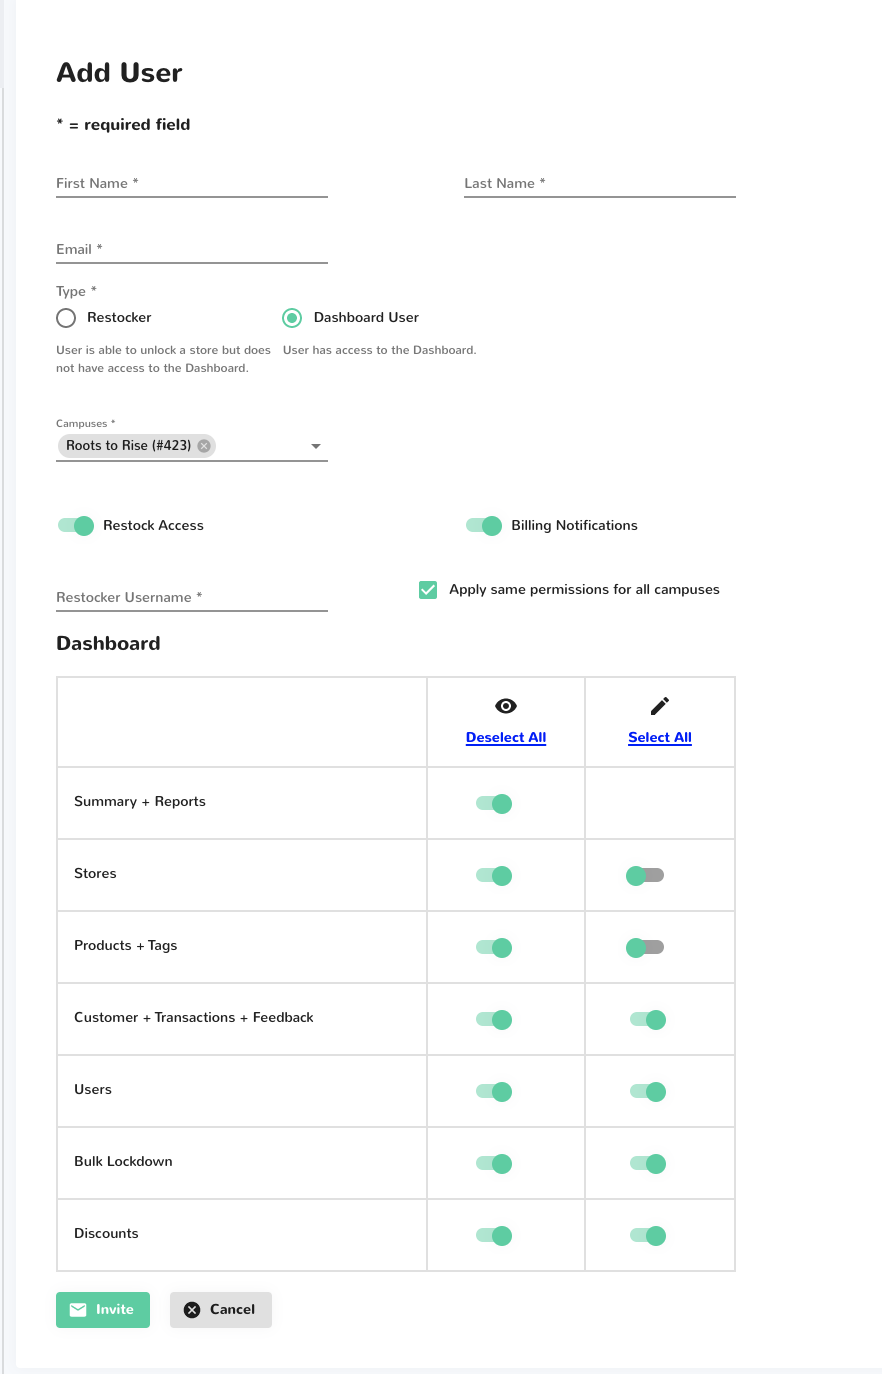
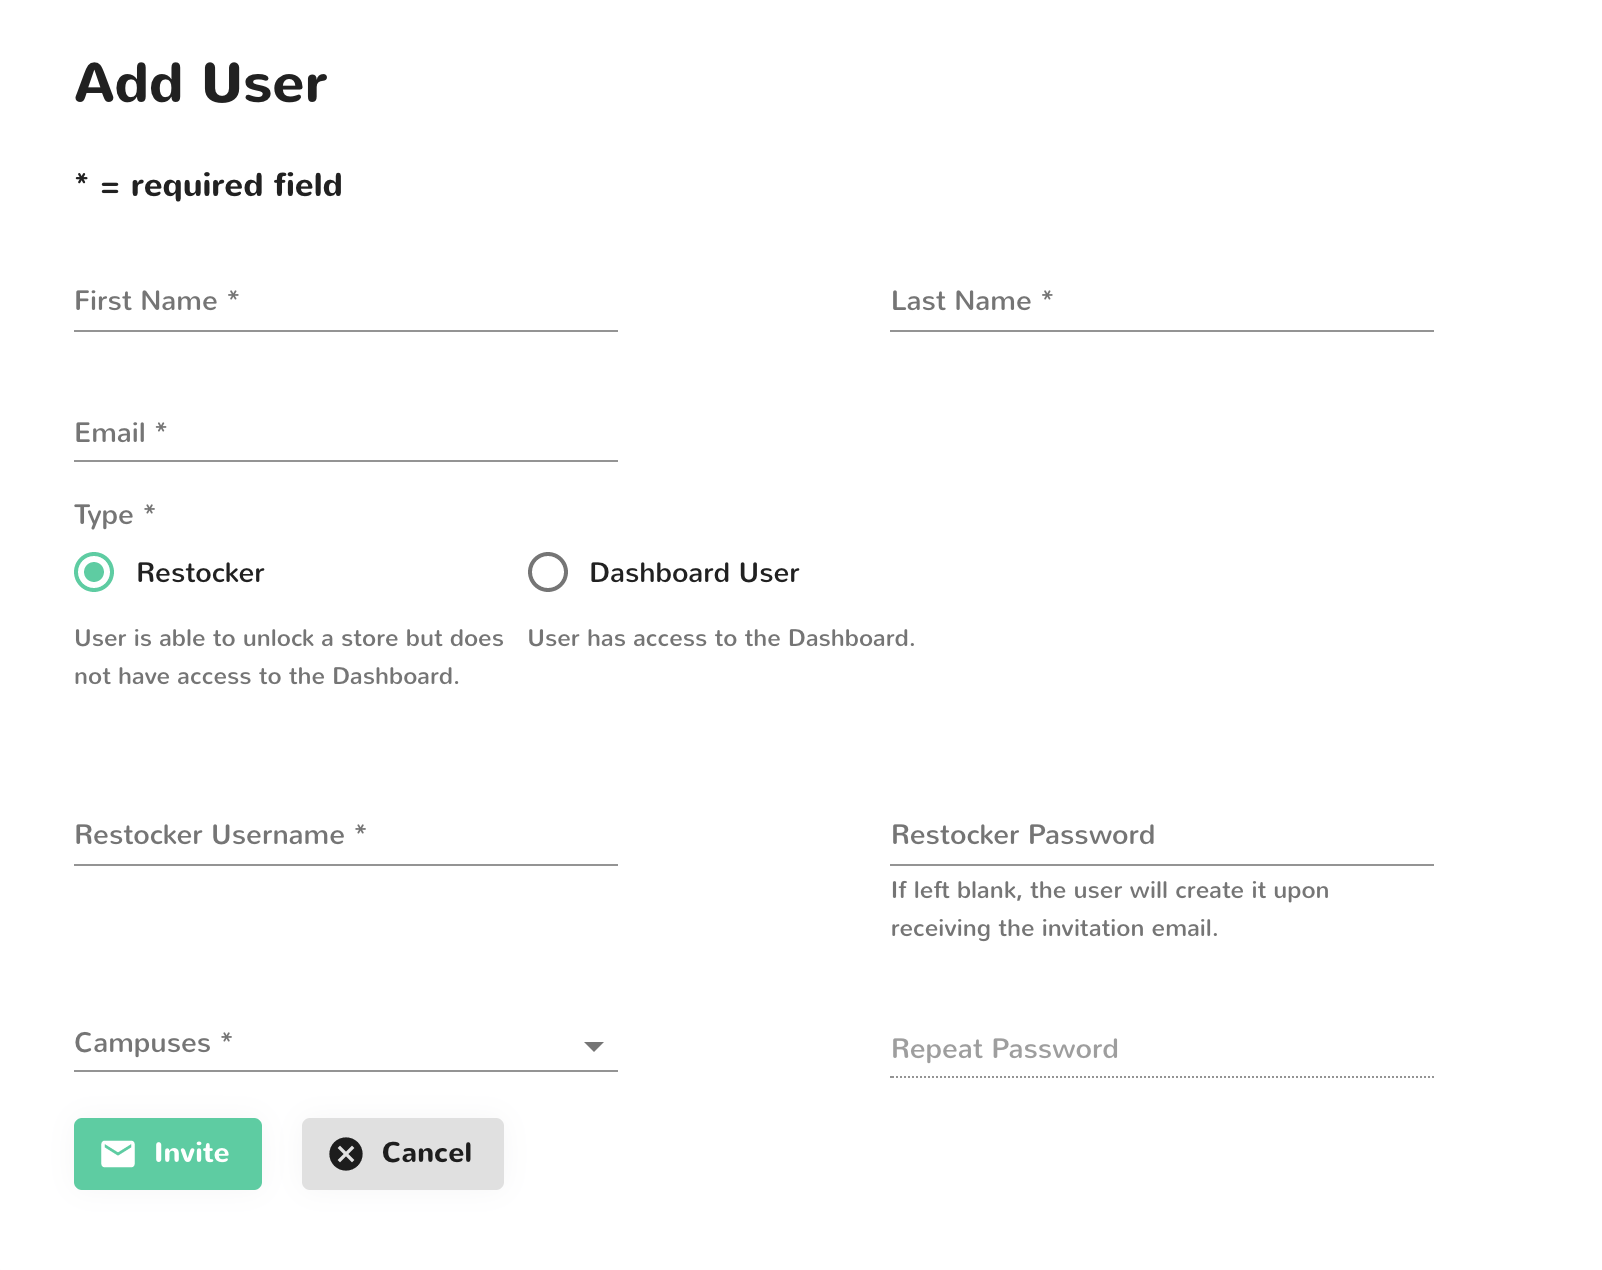
- Enter the new user's information:
- First Name
- Last Name
- Email Address: This email is where any remote commands will be sent, ie menu screenshots
- Restocker Username: this is used to log in to the dashboard and the store's tablet screen; for regular restockers, we recommend keeping it short
- Password
- Campus: If you have multiple campuses in your account, you can select which ones this user will have access to
- User Permissions: This allows you to toggle edit AND/OR view access for each section of the dashboard per user. Toggle on for access (will be highlighted green) OR Toggle off for no access(will be greyed out). This can be updated by the account's primary contact.
- Select Invite to create the user and send an email invitation to access the dashboard
Here is how it will look on the dashboard:
Dashboard User | Restocker User |
 |  |
How to archive a User:
- Go to the Users tab and locate the user
- Under the Actions column, click the icon that looks like an arrow going in a box
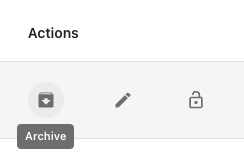
This will deactivate the user from logging into the Byte store and/or the dashboard.